

Team management
Everyone who touches your projects can have their own portal login - no shared inboxes, and everyone’s notifications go where they should.
Inviting someone
Section titled “Inviting someone”- Open Team in the sidebar.
- Select Invite user.
- Enter their name, work email, and phone.
- Choose a role: User or Manager.
- Send. They receive an email invitation and sign in with their own address - onboarding is already done, so they land straight on the dashboard.
User or Manager?
Section titled “User or Manager?”| Ability | User | Manager |
|---|---|---|
| Inventory, installs, will-call, issues, notifications, own profile | Yes | Yes |
| See invoices, manage payment method, automatic billing | No | Yes |
| Invite and manage team members | No | Yes |
Give Manager to whoever owns billing; User fits designers and project staff who need the day-to-day without the financials.
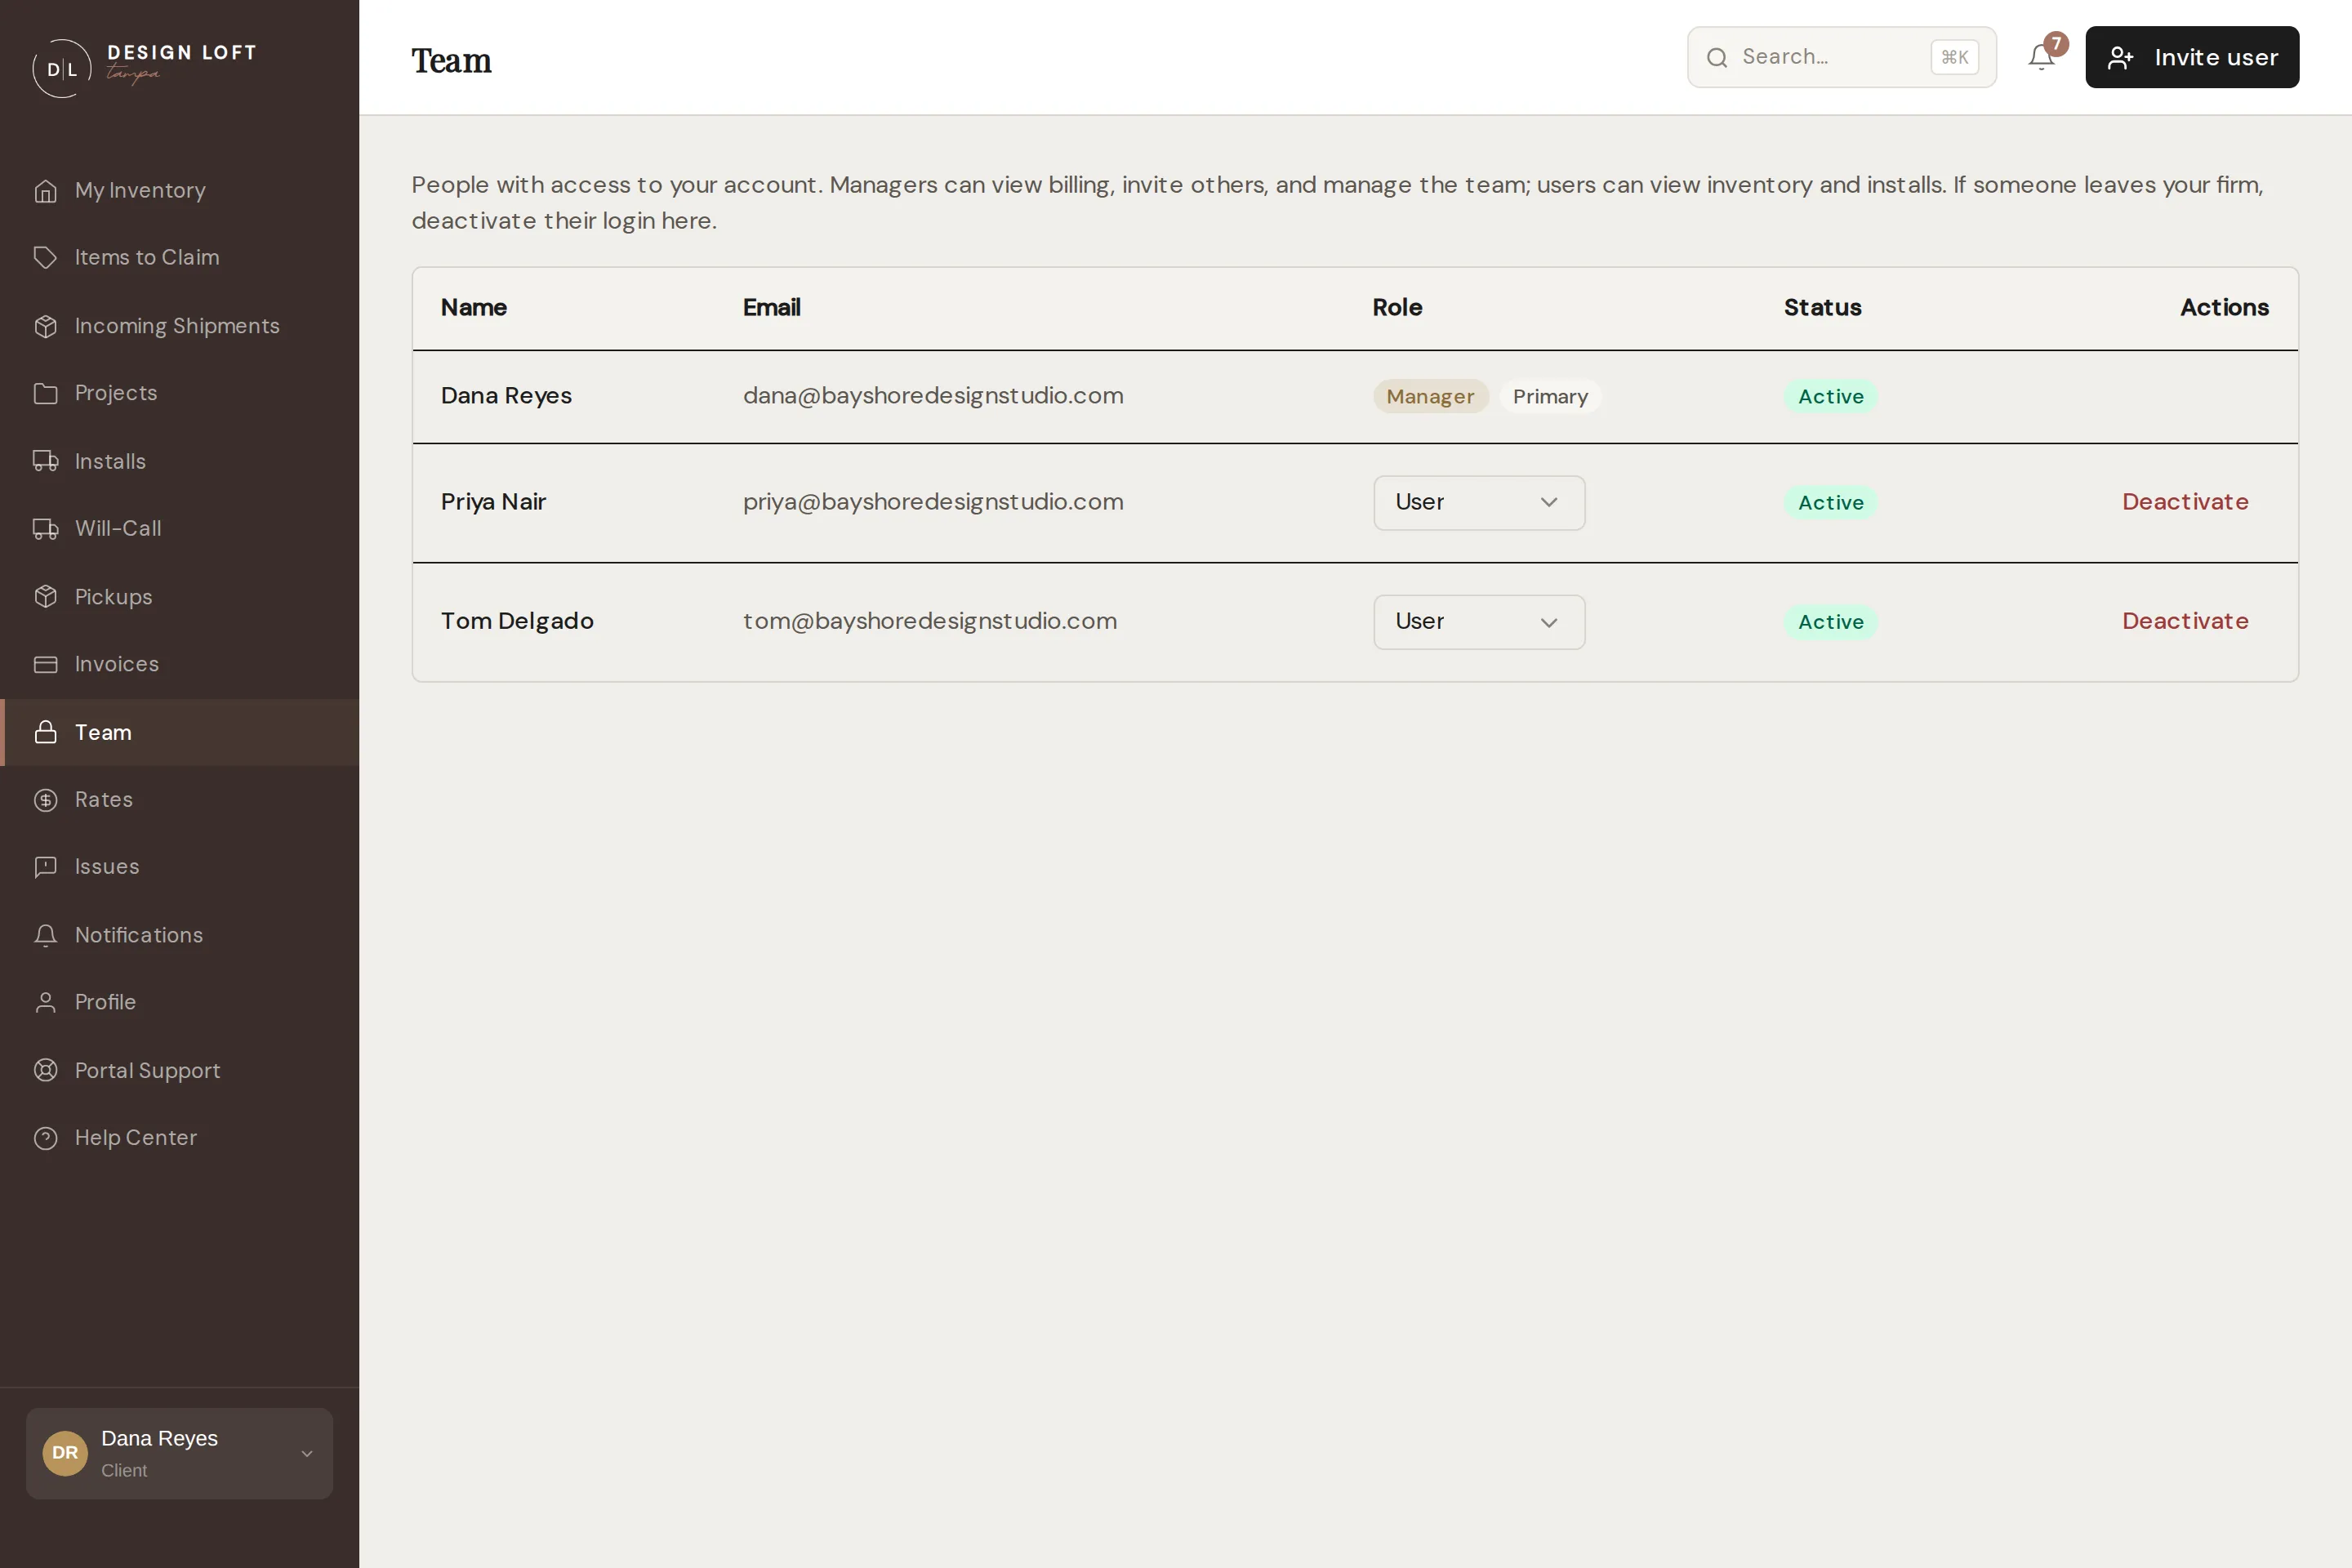
The team table shows each member’s role and status - Active, Invited (they have not accepted yet), or Deactivated - so you always know who has access.
Changing someone’s role
Section titled “Changing someone’s role”Roles are not set in stone. In the team table, use the role dropdown on a member’s row to switch them between User and Manager - the change takes effect immediately. Promoting someone to Manager asks you to confirm, since it opens up billing.
When someone leaves
Section titled “When someone leaves”Select Deactivate on their row. They can no longer sign in and stop receiving notifications, but their history stays put. If they come back, Reactivate restores access just as quickly.
Two rows are always locked: your own (so you cannot lock yourself out) and the account’s primary login. If either of those needs to change, contact us.