

Becoming a client
Design Loft Tampa works with interior designers and design firms by application. Here is the path from first contact to an active account.
1. Submit the application
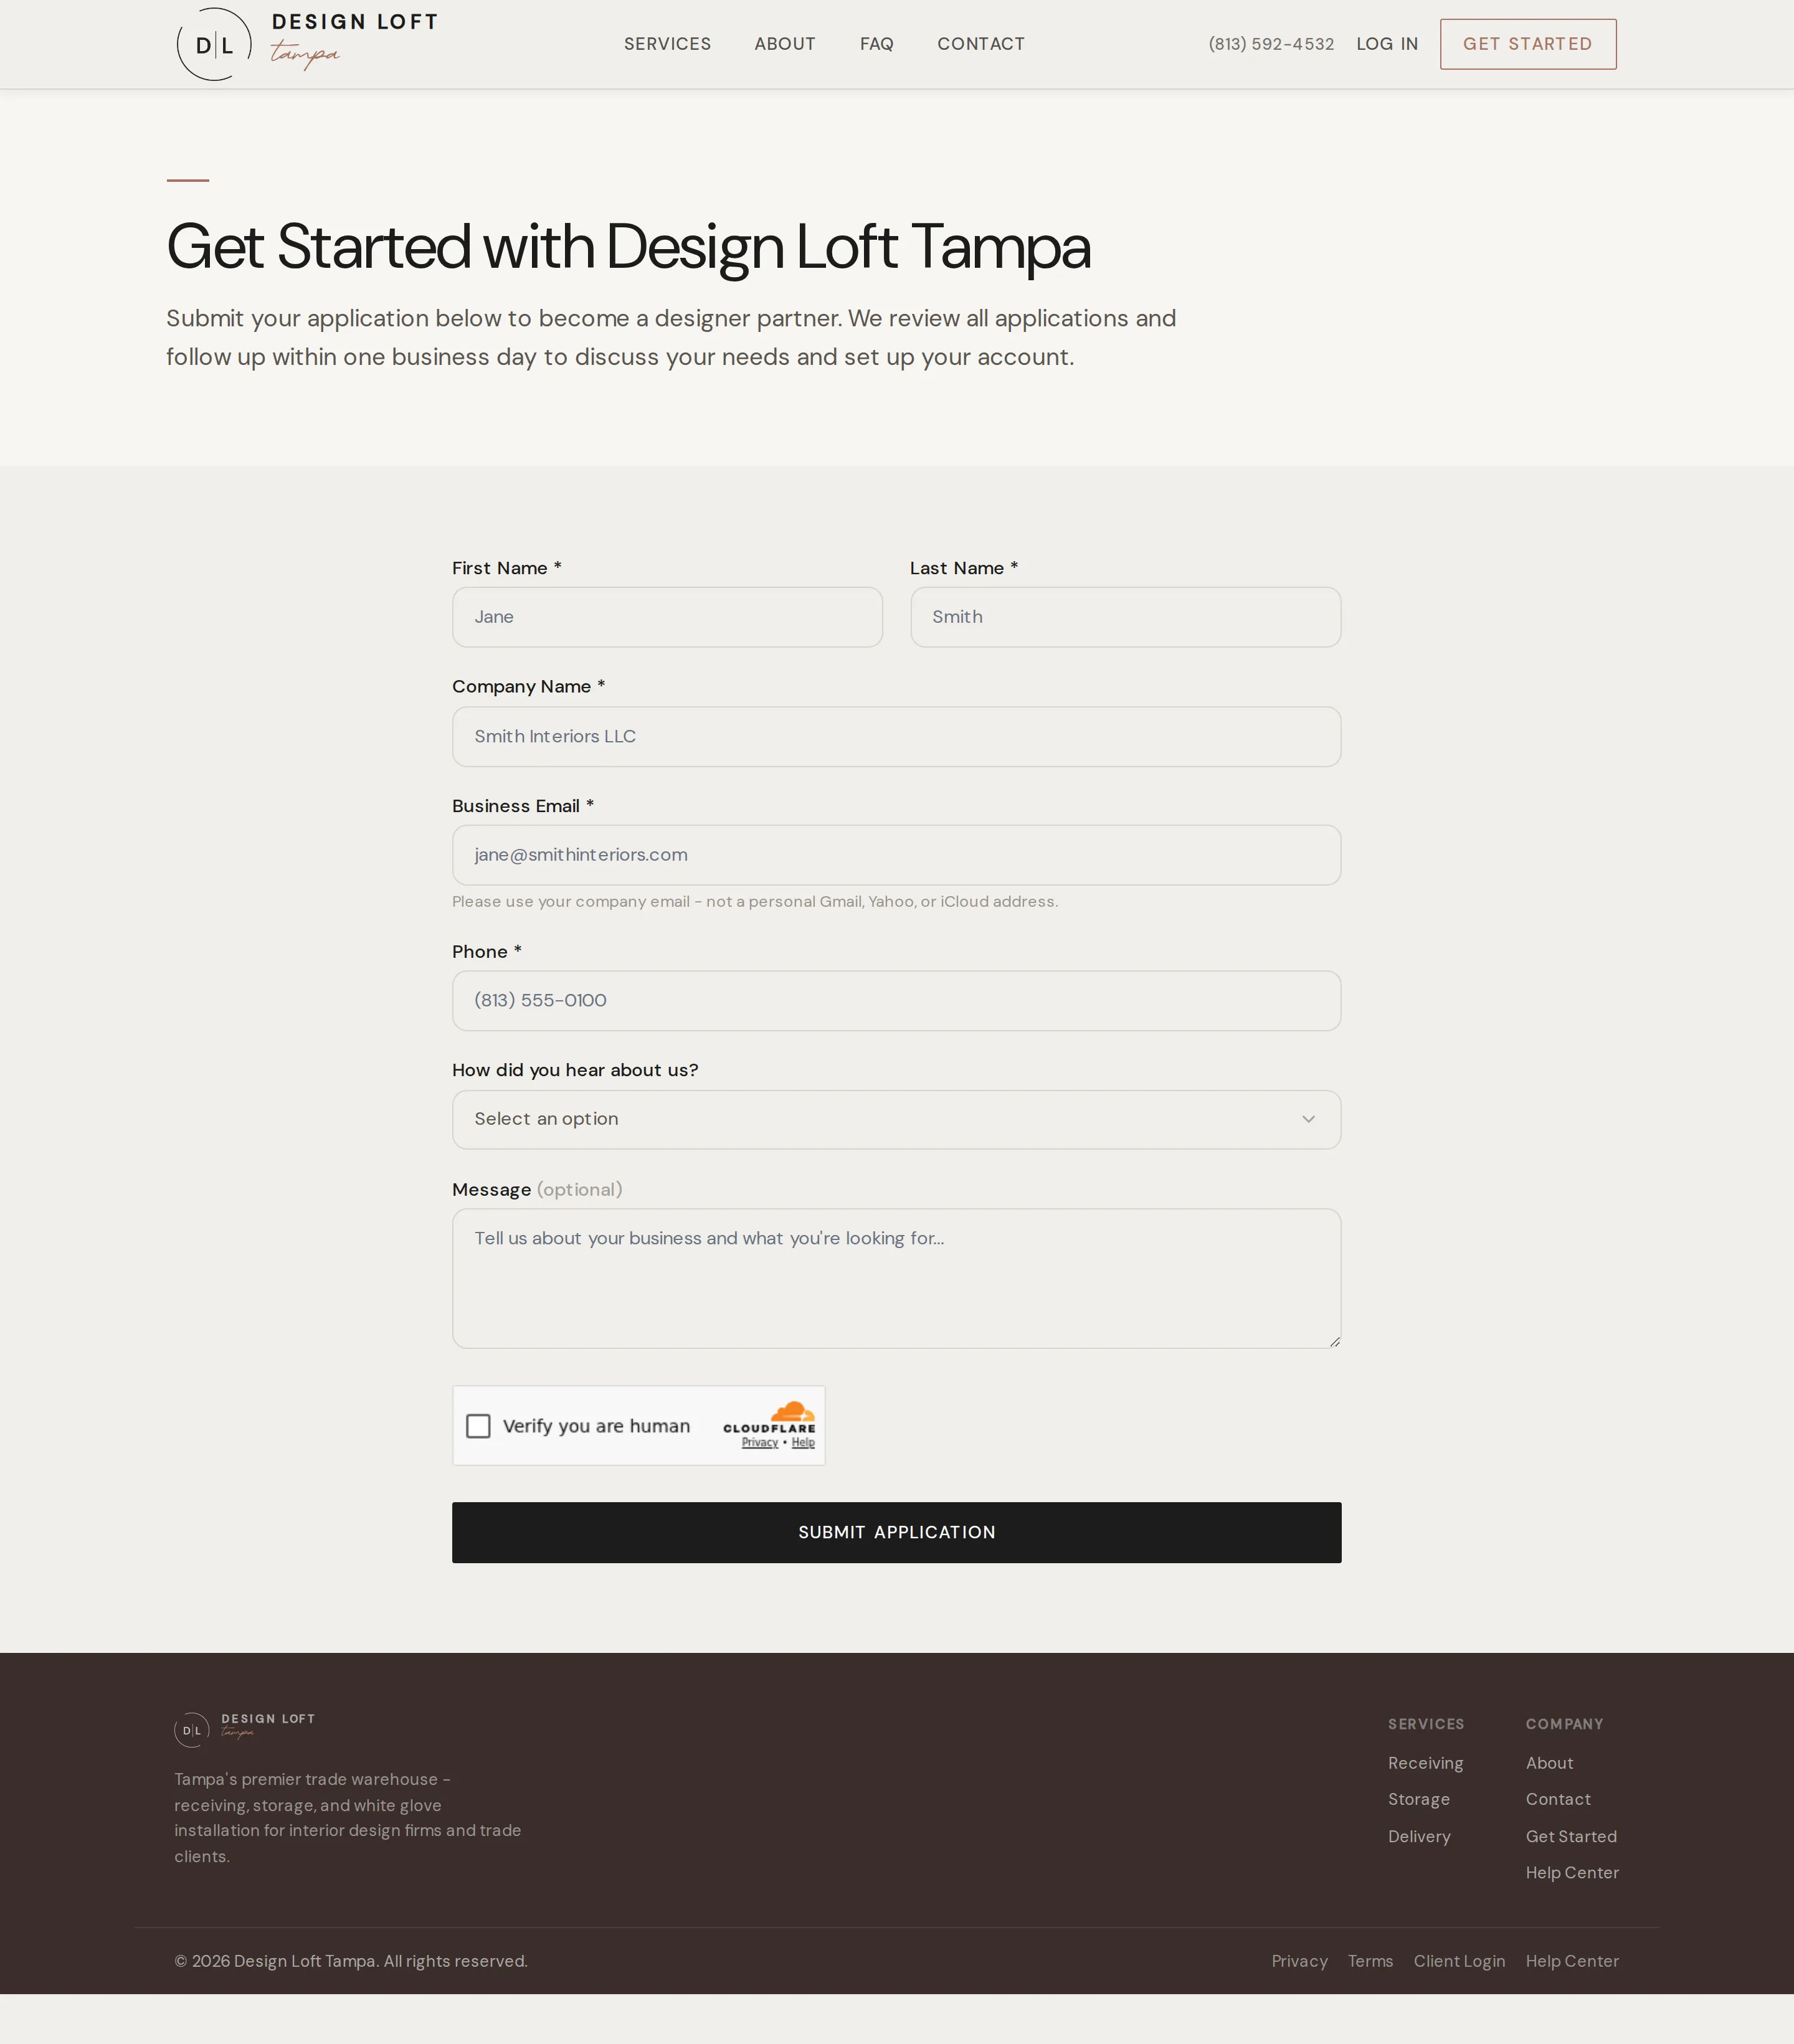
Section titled “1. Submit the application”Go to designlofttampa.com/get-started and fill out the short application.
- Enter your name, your company name, and a phone number we can reach you on.
- For Business Email, use your company address - the one at your firm’s own name, like jane@smithinteriors.com. Personal accounts (Gmail, Yahoo, Outlook, iCloud, and the like) are not accepted, because your account is set up around your firm rather than one person.
- Tell us how you heard about us, and add a short note about your projects and what you need received or stored.
- Complete the quick check that confirms you are a real person, then select Submit Application.
If the form comes back with a message instead of a thank-you:
- It asks for a business email. You applied with a personal address. Re-enter the email at your company’s own name and submit again.
- It says your company already has an account. Someone at your firm signed up before you. Sign in with your work email instead, or ask your account manager to add you to the team - see Team management. If that looks like a mix-up, email info@designlofttampa.com.
- It could not verify that you are human. The check on the form did not finish. Reload the page, complete it, and submit again.
2. We review and reach out
Section titled “2. We review and reach out”Our team reviews every application. We will contact you to talk through your receiving and storage needs, pricing, and timelines. If it is a fit, we create your account and send an invitation to the email address you applied with.
3. Sign in and complete onboarding
Section titled “3. Sign in and complete onboarding”Your invitation email contains a sign-in link. The first time you enter the portal you will be guided through onboarding: confirming contact details, signing the warehouse agreement, insurance acknowledgment, payment authorization, and shipping setup.
4. Add a payment method
Section titled “4. Add a payment method”The final step is putting a payment method on file - a credit card or a bank account (ACH). Card details go directly to our payment processor and never touch our servers. See Payment methods.
Once onboarding is complete, your dashboard is live and you can start shipping items to the warehouse.